How to Install Kali Linux on VirtualBox {Step by Step Tutorial}
- Get link
- X
- Other Apps
Download VirtualBox
Here you will find links to VirtualBox binaries and its source code.
VirtualBox binaries
By downloading, you agree to the terms and conditions of the respective license.
VirtualBox 7.0.18 platform packages
Step 1: Create Kali Linux VirtualBox Instance
Create a new virtual machine and configure it to run Kali Linux. Proceed with the steps below to correctly set up a Kali Linux VM in VirtualBox:
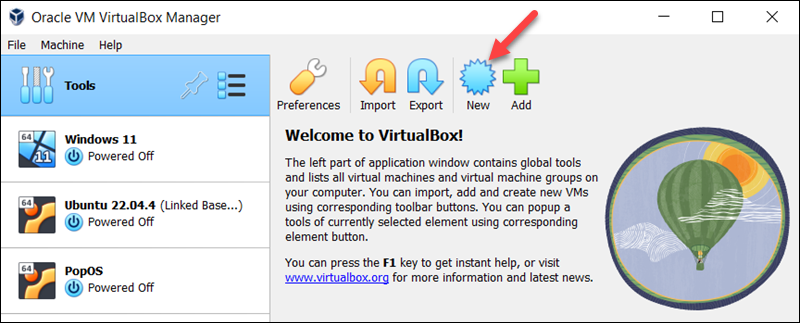
1. Launch VirtualBox Manager and click the New icon.
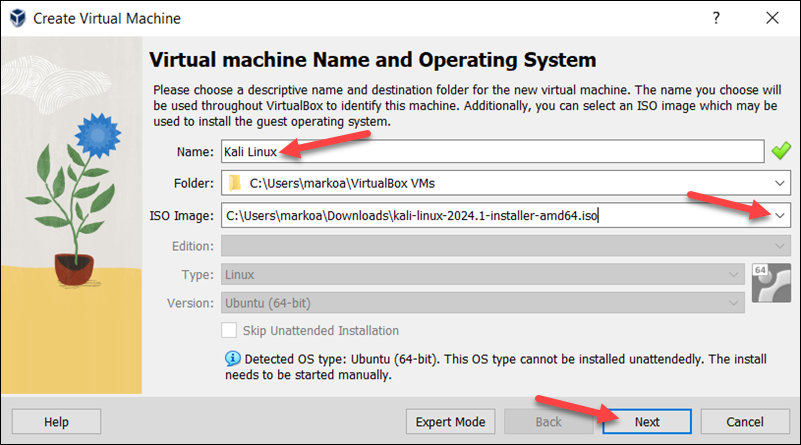
2. Specify a name for the VM and provide the path to the ISO image. Select Next.
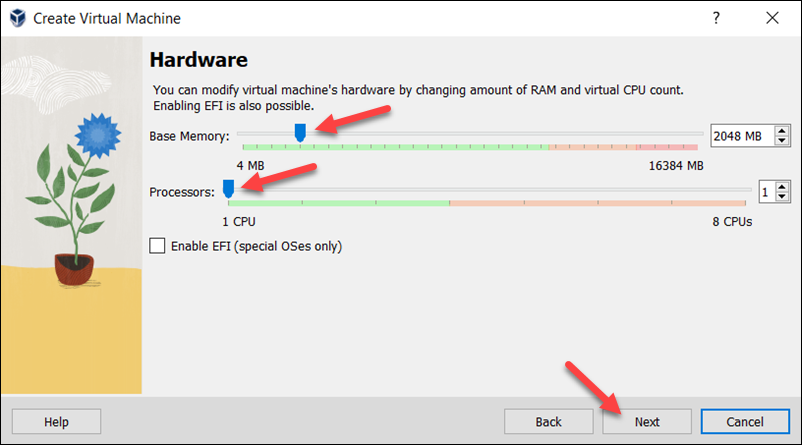
3. Select the amount of memory and the number of virtual CPUs to allocate to the VM. The minimum recommended values for Kali Linux are 2 GB of RAM and 1 CPU. Select Next when you finish setting up the VM hardware.
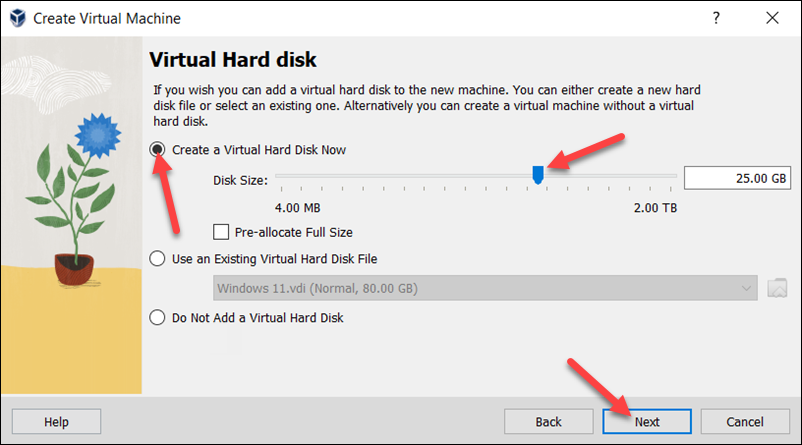
4. Create a virtual hard disk for the new VM. The recommended hard disk size is at least 25 GB. Alternatively, you can use an existing virtual hard disk file or decide not to add one. Click Next to proceed to the next step.
5. Review the new VM setup on the Summary page. Select Finish to create the virtual machine.
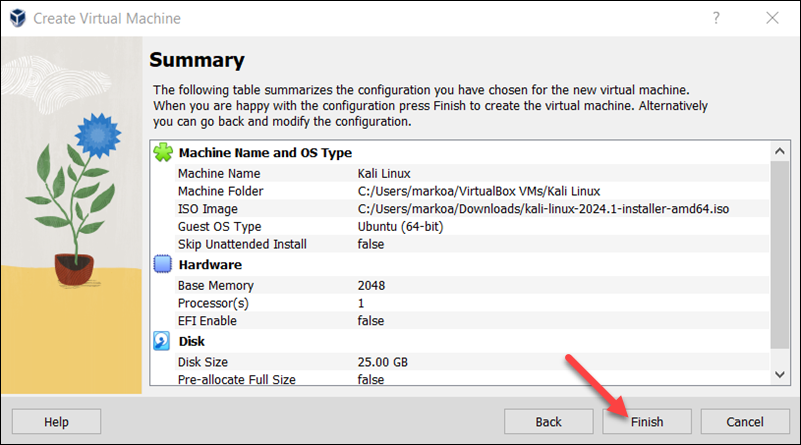
The VM appears on the list in VirtualBox Manager.
Step 2: Configure Virtual Machine Settings and Start VM
Before starting the VM and beginning the installation process, follow the steps below to perform additional adjustments on the VM:
1. Select the Kali Linux VM and click the Settings icon.
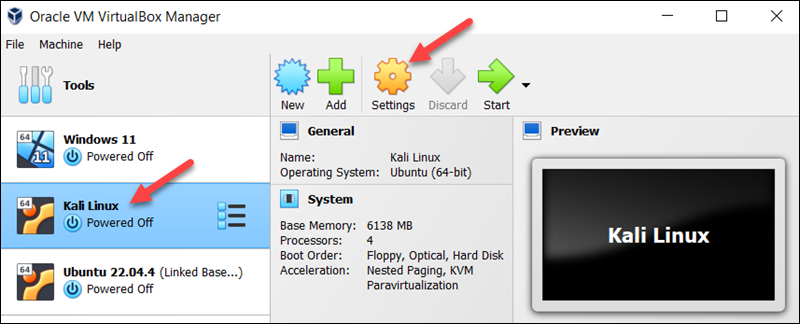
2. Select the Advanced tab in the General section and change the Shared Clipboard and Drag'n'Drop settings to Bidirectional. This feature allows the host and the guest machine to exchange files.

Warning: Connecting the host and VM clipboards breaks VM isolation. Use this option with caution.
3. Select Network from the menu on the left side. Change the Attached to field to Bridged Adapter. Select OK at the bottom of the window to return to the main window.
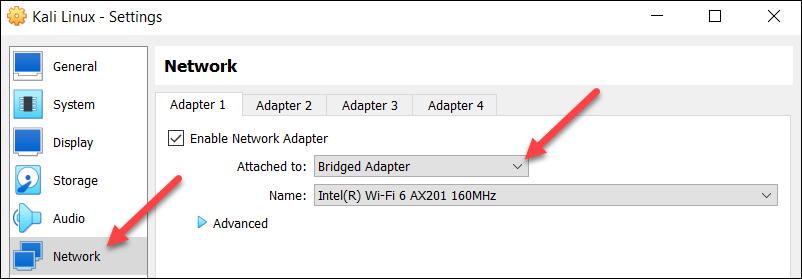
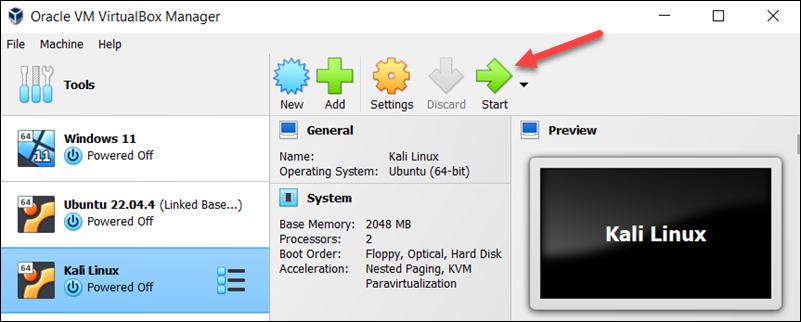
4. Click Start to begin installing Kali Linux.
How to Install Kali Linux on VirtualBox
Kali Linux uses the Debian installer to set up the operating system. The sections below provide a detailed walkthrough of the installer and offer advice on configuring Kali Linux.
Step 1: Perform Initial Configuration
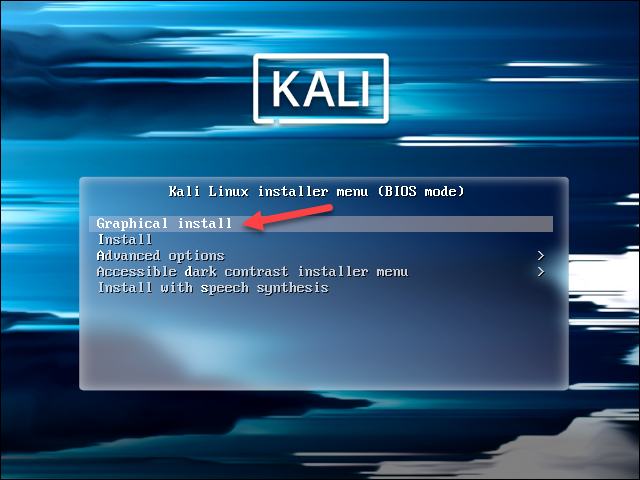
When the new VM is started, the Kali Linux installer menu appears. Start the installation procedure by following the steps below:
1. Select the Graphical install option.
2. Choose the system's default language, which will also be used during installation.
3. Find and select your country from the list, or choose other.
4. Decide which keyboard mapping to use.
Step 2: Configure Host, User, and Time Zone
The following installer steps set up the hostname and domain of the system and configure the user:
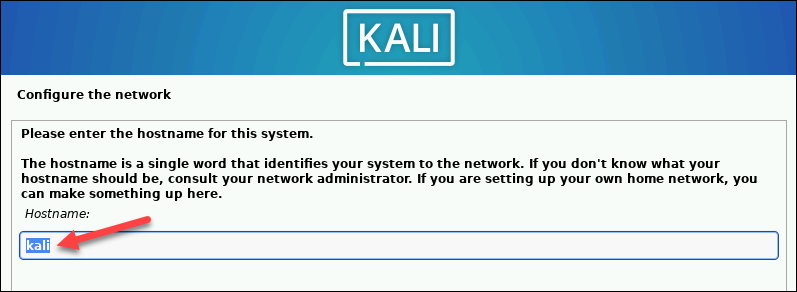
1. In the Configure the network section, enter a system hostname.
2. Type a domain name that the OS will use to identify the VM within a network. Specifying a domain name is not necessary if the VM is not part of an extensive local network.

3. Create a user account by providing the user's full name and username.
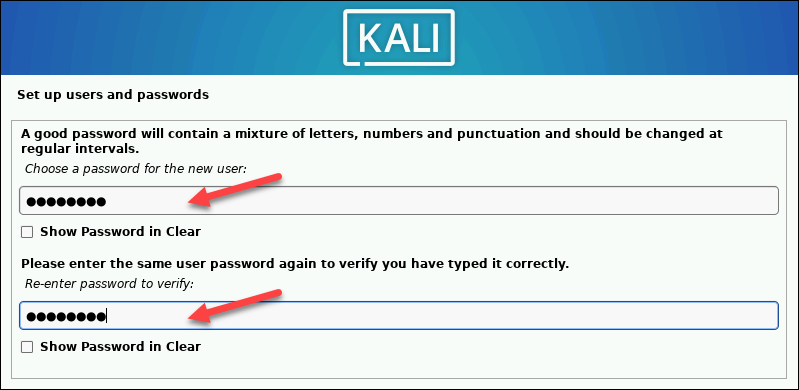
4. Create a strong password for the user account.
5. Select the correct time zone from the available options.
Step 3: Create Hard Disk Partitions
Proceed with the following steps to create a bootable partition on the virtual hard disk:
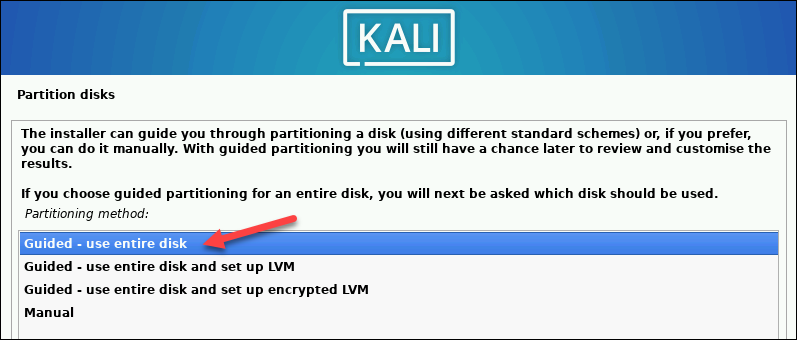
1. Select how to partition the hard disk. The default option is Guided - use entire disk.
2. Select the disk you want to use for partitioning. The only available option is the disk created during the VM creation.
3. Select the partitioning scheme. The default option is All files in one partition.
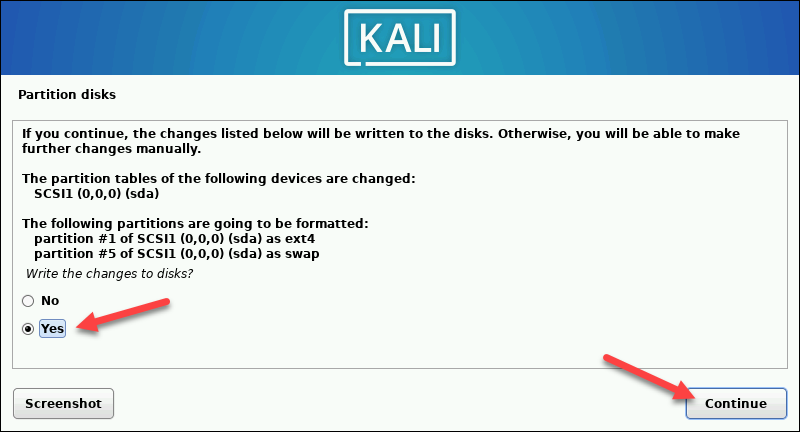
4. The wizard provides an overview of the configured partitions. Ensure that the Finish partitioning and write changes to disk option is selected.
5. Confirm the choice by selecting Yes on the next screen.
The wizard starts installing Kali.
Step 4: Customize Kali Linux Installation
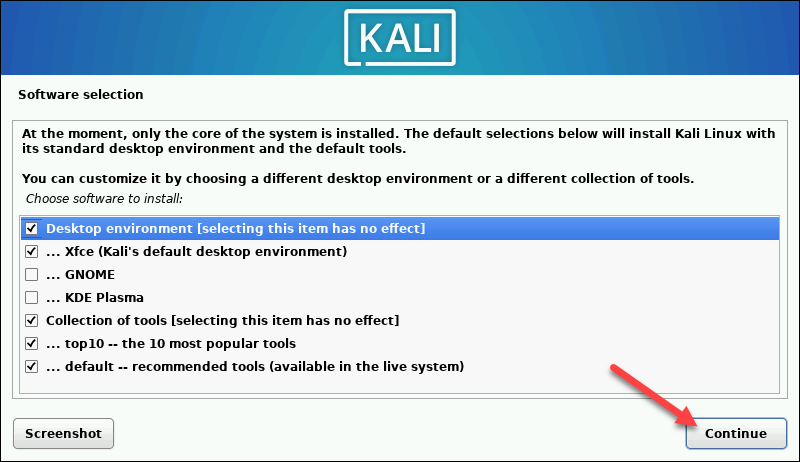
After installing the system's core, Kali enables users to customize the OS further. Choose the components to install by executing the following steps:
1. Select the desktop environment and the tools you want, or click Continue to proceed with the default options.
2. Select whether you want to use a network mirror.
3. If you use an HTTP proxy, enter the necessary information. Otherwise, leave the field blank.
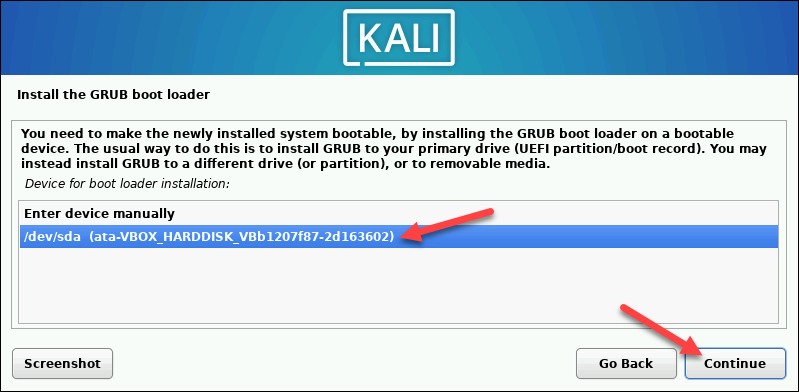
4. Install the GRUB bootloader on the hard disk. Select Yes and Continue.
5. Select a bootloader device to ensure the newly installed system is bootable.
When Kali finishes installing, the Installation is complete message appears.
6. Click Continue to reboot your VM. After rebooting, the Kali login screen appears.
7. Enter the username and password created in the previous steps.
The Kali Linux desktop appears on the screen.
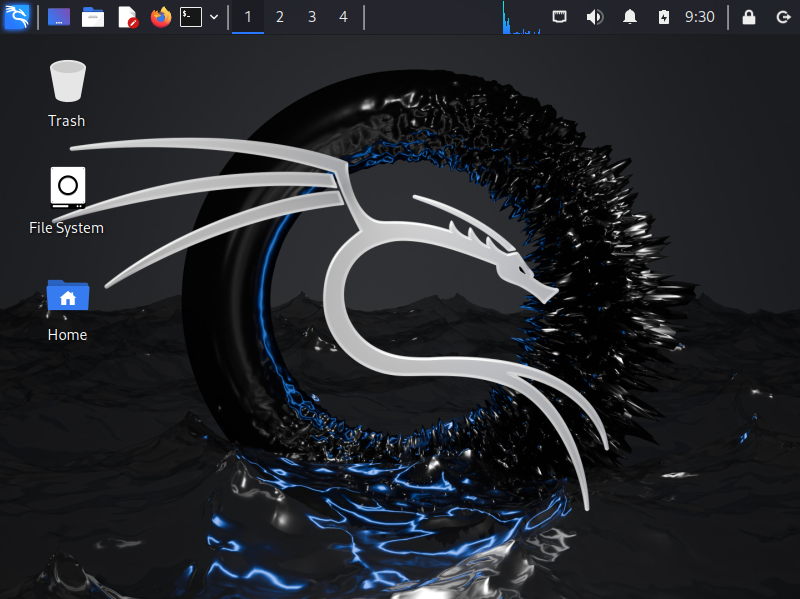
Running Kali Linux Pre-Built VM on VirtualBox
A quick way to run a Kali Linux VM is by using a pre-built VirtualBox image. The section below explains how to obtain and start a pre-built Kali Linux image on VirtualBox.
1. Visit the Pre-built VMs page on the official Kali Linux website.
2. Select the desired architecture and click the download button in the bottom left corner of the VirtualBox card.

3. Wait for the 7z file to download, then unpack it to a directory of your choice.
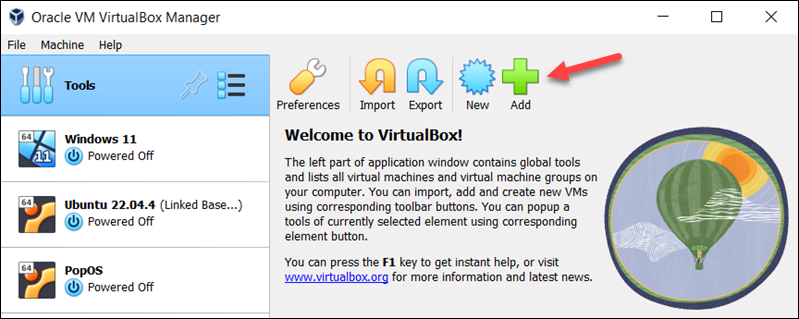
4. Open VirtualBox Manager and select the Add button in the top menu.
5. Locate the virtual machine file you downloaded and unpacked. Double-click the file to open it.
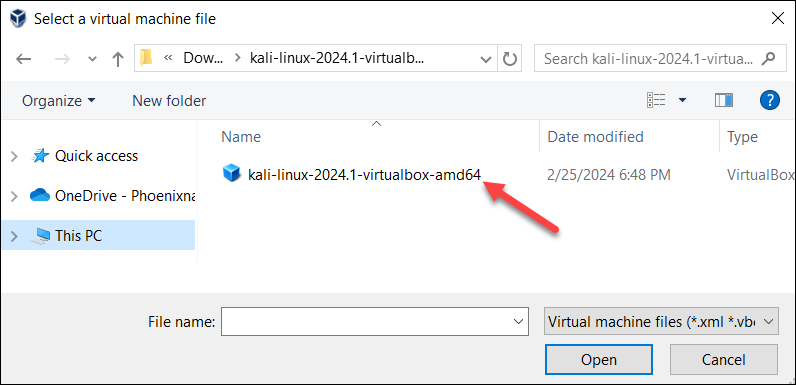
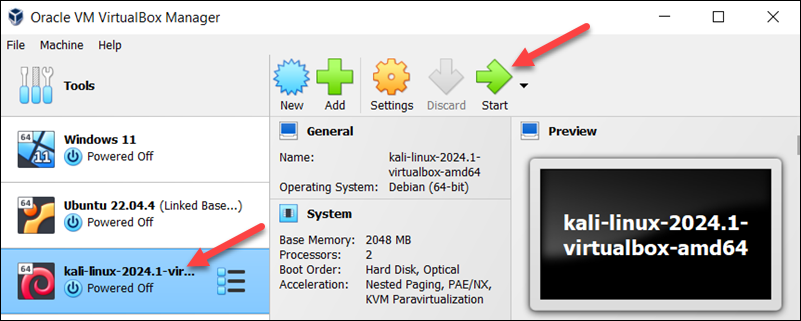
A Kali Linux VM instance appears in the menu on the left side of the screen.
6. Select the instance and click the Start button in the top menu.
Wait for the system to boot up.
7. On the login screen, use username kali and password kali to log in.
- Get link
- X
- Other Apps


Comments
Post a Comment